A story of my kitchen (dreams made reality)

LIGHTING
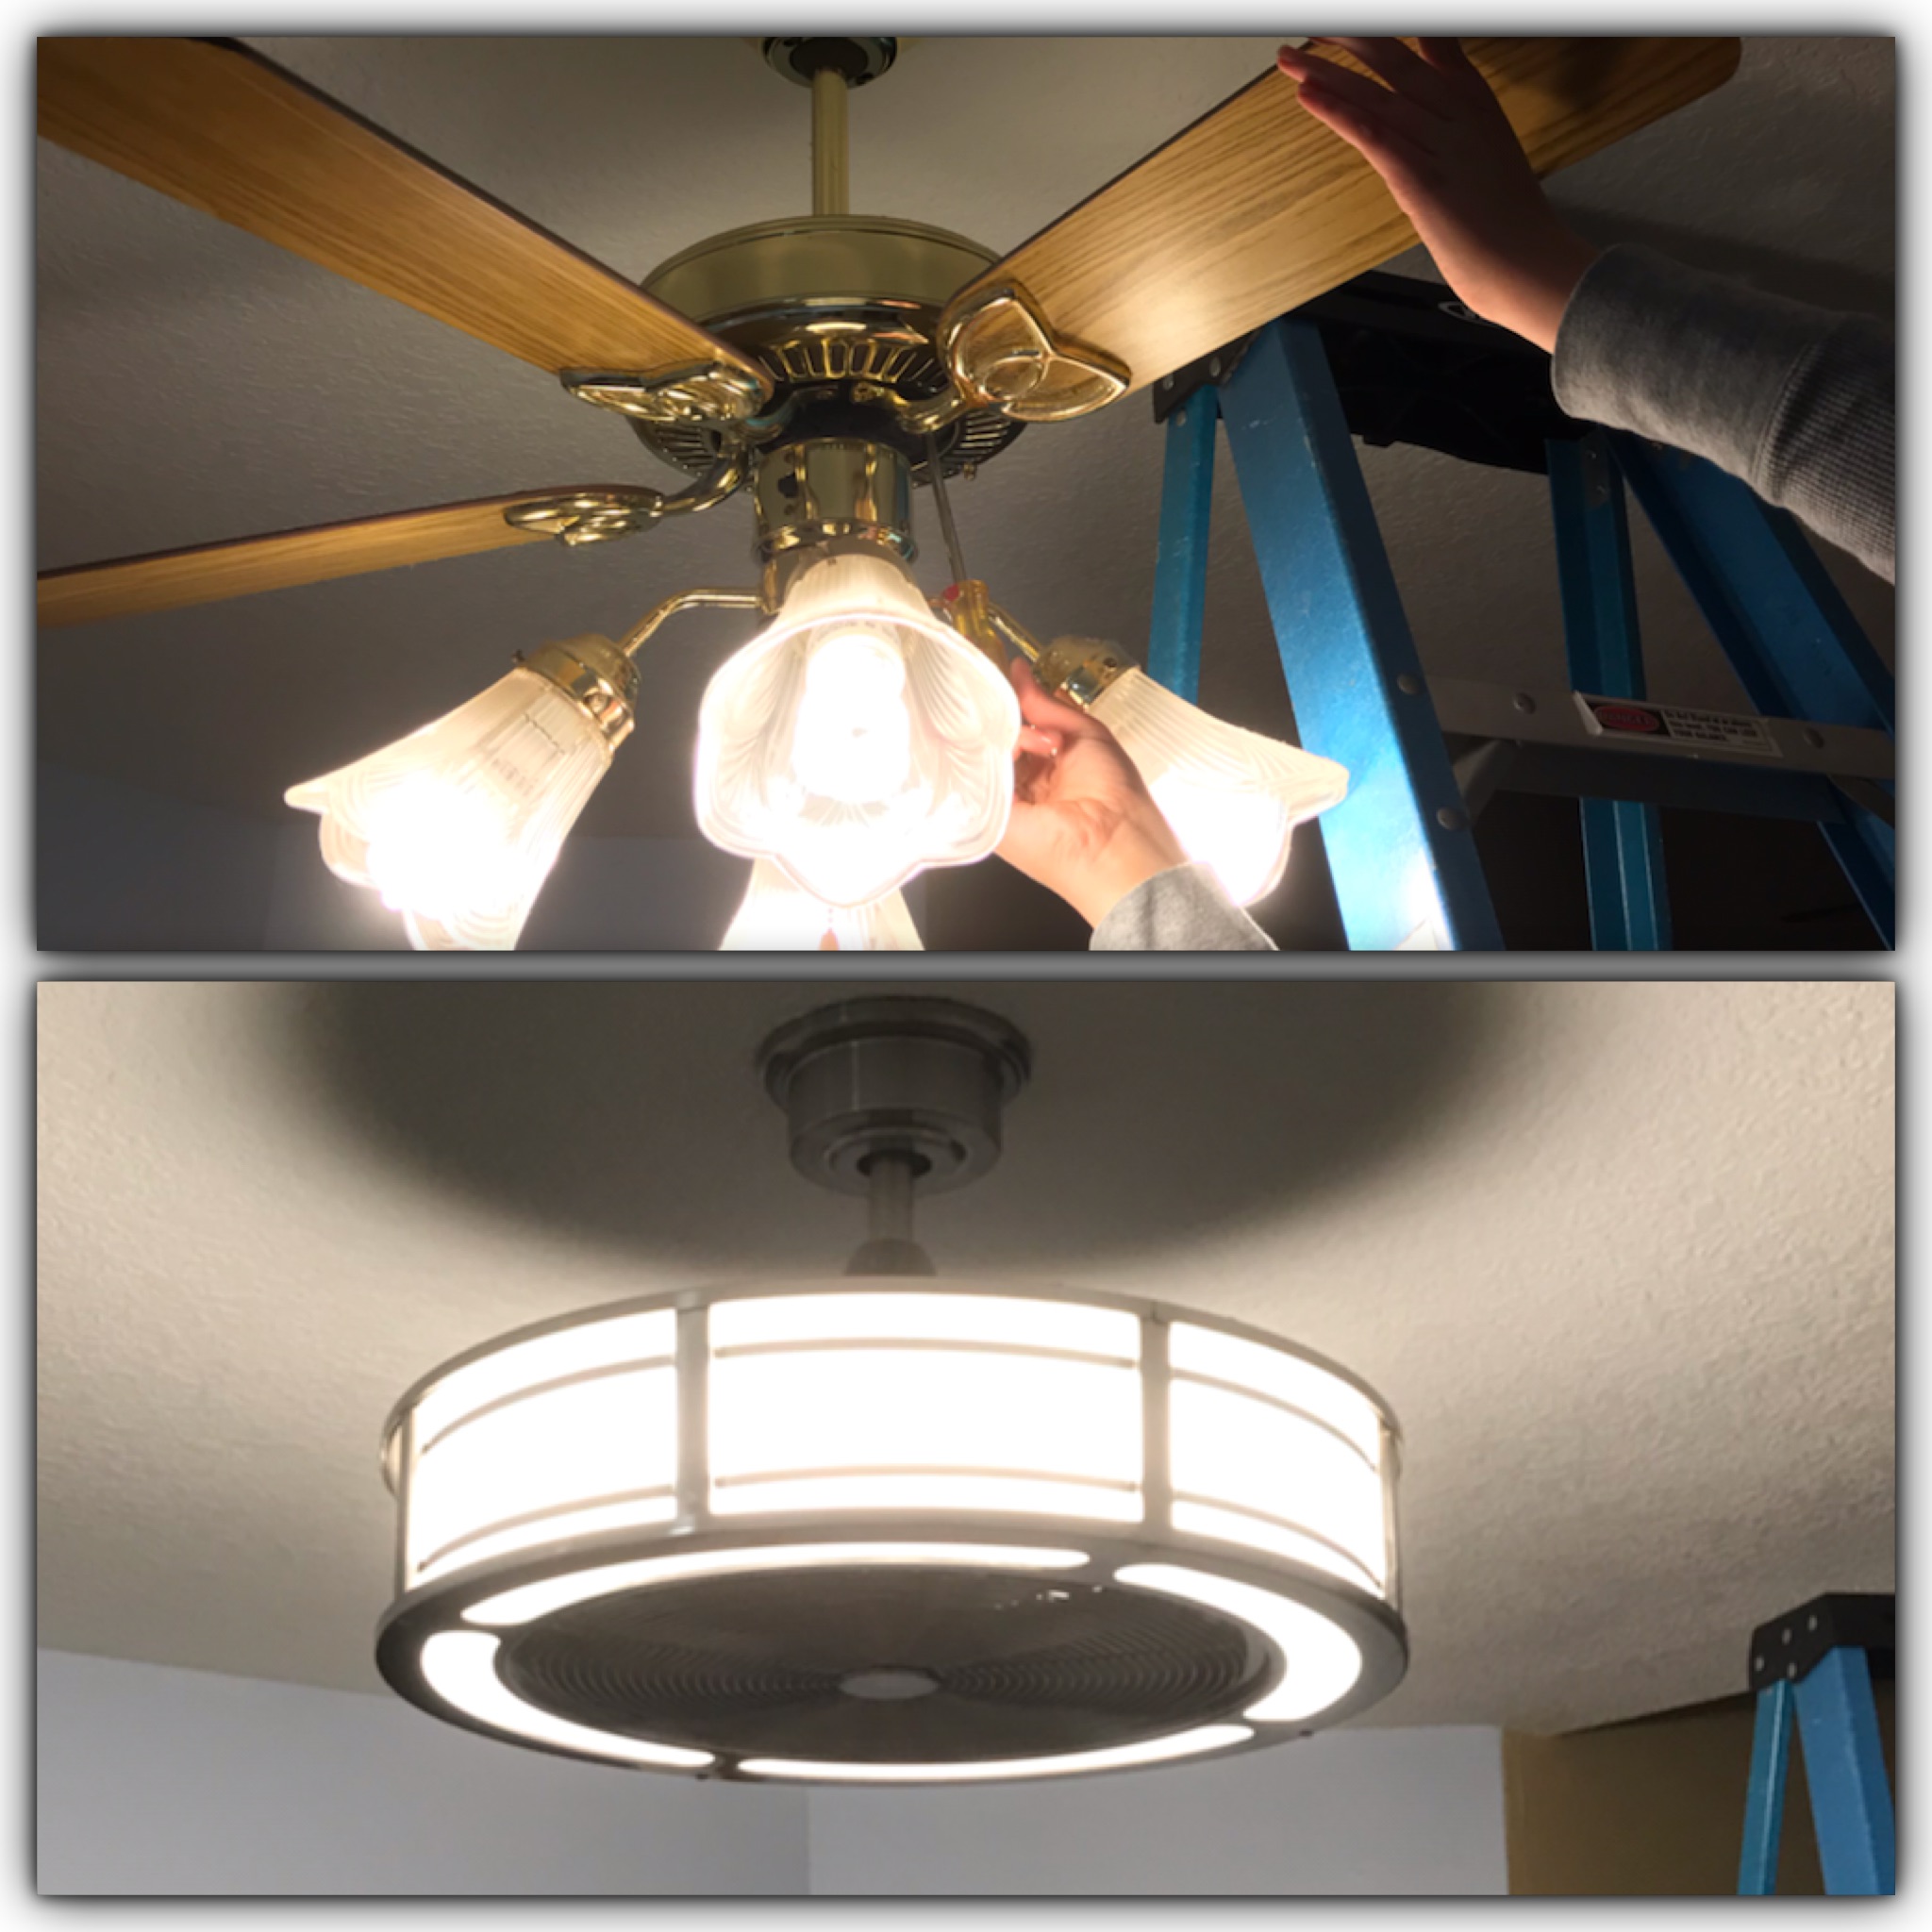 I took down a worn out ceiling fan from above the table and wanted something that could serve as a fan but also give off good lighting. While looking at local big box stores, I fell in love with this drum ceiling fan and light even though it cost a bit more than what I'd planned to spend. I took down the old one and had it replaced with this new one all in under an hour. This one has a dimmable LED light and 3 speeds for the fan. I also managed to somehow choose a random number sequence for the remote code that corresponds with a remote of one of my neighbors 😂
 For the main portion of the kitchen, I took down what can only be called a dated and dust laden wooden box that had fluorescent tube lights under it or light (singular) as one of the sides stopped working years ago. The light's electrical box was much more off center than I dreamed it would be so I did a quick run to Home Depot and bought a new box, drilled a hole in the wood to pull the wires through and made the opening slightly more centered and salvaged a piece of drywall I had cut out at the location where I was placing the new light and managed by some act of God to be able to use some gum and pixie dust to get it to fit over the old hole and made it look like it was part of the original drywall.This is the LED light that I hung in the kitchen. Can you say "bright light, bright light"?! LED lights definitely beat fluorescent bulbs in my book!
 |
| The sink is stainless steel and faucet is a reused one & is brushed nickel. |
BACKSPLASH
Anytime somebody compliments me on my backsplash, I think of Lightning McQueen in Cars. As you can see, my backsplash is not red nor does it ride in circles around a track, but Lightning is often referred to as "Stickers" by Sally because his headlights are just stickers. In the same way, my backsplash is just a glass-tile-wannabe set of premium stickers. This is what I used. My priority during my makeover was to give the kitchen a clean look, and I definitely always wanted a backsplash, but I wanted to spend the majority of my budget on my flooring and my countertops so I opted to go with a backsplash that was relatively inexpensive, easy to clean and install, and added a splash of color without breaking the bank. Most wouldn't know that they're my stickers if I didn't tell them.

For my kitchen, I decided to go with a flooring that was luxury vinyl but with a look of tile and with a synthetic grout substance. This involved gluing down the flooring and the kitchen has many nooks and crannies so I paid installers to come and get it done right. This is a link to the tile I used. Like everything else I decided on, this is a great choice and it has held up well to 4 humans and 2 dogs over the last year with a lot of traffic.
I highly encourage anyone with new flooring to look into products that keep
the floors from getting scratched. I tried the adhesive felt pads first.
I knew within a day that that wasn't going to be a good fit. So next I
went with these screw
on felt pads and they've held up very nicely over the last year and fit
perfectly into the holes already in the bottom of my kitchen chairs.
 |
| Left is old paint and vinyl Right is new paint and after vinyl painted over and removed. |
As I mentioned before, Sherwin Williams was having a paint sale and I love their no VOC paint, so that is what I used on the walls in the shade of blithe blue. I had to paint over an area where I had art on the wall and vinyl letters. I will tell you that I had lost sleep over what I was going to do and had just resigned myself to the fact that I would have to scrape off the vinyl letters and start all over with another Etsy purchase. Fast forward to painting day. I tried to use a small brush to paint around the letters but quickly learned that wasn't going to work. On a whim I painted over a couple of letters and pulled up a corner of the vinyl and it left a perfect stencil of the vinyl behind. I was so excited and it looks splendid. As for the ceiling, I bought ceiling paint and it matched the paint (not planned) that was already there perfectly so I just touched up the area near the light where I had moved a piece of drywall around and where the previous owner had apparently had a food mishap on the ceiling and it looked like new without having to put white splatters all over my kitchen!!


 |
| Glimpse of the 20 year old flooring |
Disclaimer and lots of words of encouragement:
Just because you've never done something or don't know how to do it doesn't always mean that you shouldn't do it. There's a whole world of blogs and vlogs and youtube out there of people that would love nothing more than for you to click on their video to learn a new skill. Won't you allow them to walk you through the process and then you can decide with a bit of wisdom whether that project is a can do or a hire out/ask for help project. Neither is admitting defeat. I've done my share of asking for help but by doing so I now know how to change a tire and change my breaks and I can make a mean meal in the Instant pot. Dabble away and enjoy the projects before you! 💛


Comments
Post a Comment